

How to Ceramic Coat Headlights Right
- Chris Walker
- May 14
- 6 min read

Cloudy headlights can make an otherwise well-kept vehicle look tired fast. If you're researching how to ceramic coat headlights, the coating itself is only part of the job. The finish depends on prep, lens condition, and whether you're protecting already-clear lenses or trying to save headlights that are badly oxidized.
For newer or well-maintained vehicles, ceramic coating adds a slick, UV-resistant layer that helps reduce staining, fading, and environmental wear. For older headlights with haze, yellowing, or surface damage, coating too early can lock in defects and leave you with a result that still looks dull. Done properly, though, ceramic protection can extend clarity and keep the front end looking far more refined.
How to ceramic coat headlights without wasting the coating
The biggest mistake people make is treating headlights like painted panels and rushing straight to the coating step. Headlight lenses take abuse from road debris, sunlight, bug residue, heat, and frequent washing. If the surface is contaminated or oxidized, the coating will bond over that damage rather than fix it.
Start by assessing the lenses in direct light. If they look clear and smooth with only light water spotting or minor grime, a thorough cleaning and decontamination may be enough before coating. If you see yellowing, cloudy patches, pitting, or a rough chalky feel, you are looking at restoration work first.
That distinction matters because ceramic coating is a protectant, not a repair product. It can preserve a properly corrected headlight very well, but it will not reverse oxidation on its own.
When ceramic coating makes sense
Ceramic coating is a strong option when your headlights are already in good shape or have just been restored. It creates a sacrificial barrier that helps against UV exposure, bug acids, road film, and routine washing friction. On a daily driver parked outside, that extra protection can make a noticeable difference over time.
It also makes maintenance easier. Headlights tend to release grime more easily when coated, and that can help preserve clarity between washes. For luxury vehicles, performance cars, or any vehicle where front-end presentation matters, that added crispness is worth the effort.
Still, expectations should stay realistic. A ceramic coating will not stop rock chips, and it will not last forever under constant sun exposure. The durability you get depends on the quality of the product, how carefully it was applied, and how the vehicle is maintained afterward.
Prep comes first every time
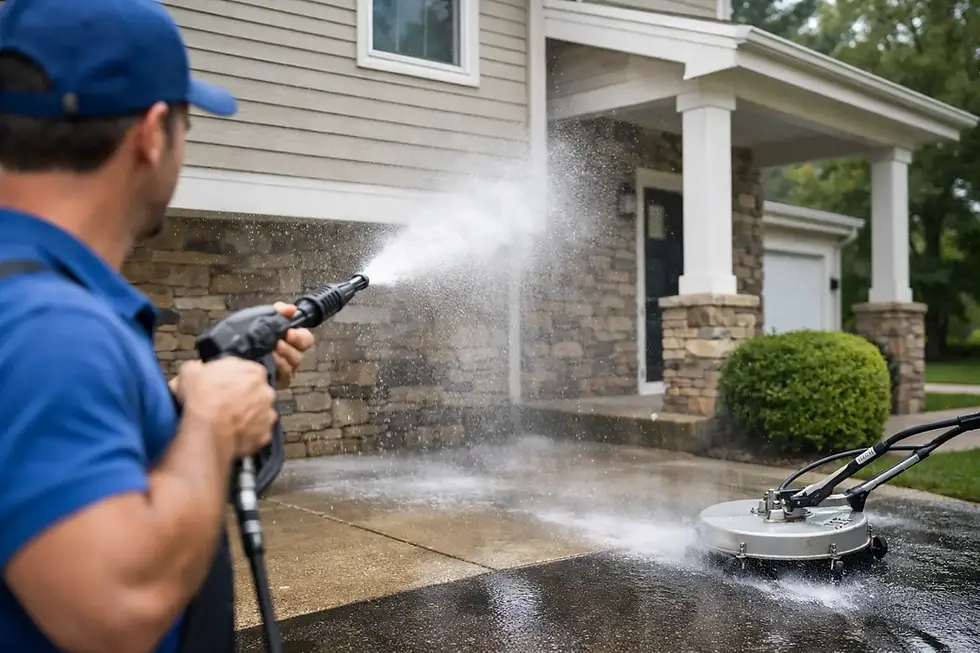
Before applying anything, wash the front end thoroughly. Use a pH-balanced car shampoo and remove bug residue, traffic film, and road grime from the headlight edges, grille area, and bumper around the lenses. Rinse well and dry completely.
Next, decontaminate the lens surface. Even if the headlights look clean, they often hold onto mineral deposits, embedded grime, and invisible residue. A dedicated panel prep or surface cleanser helps remove oils and leaves the lens ready for bonding. If you've used any polish beforehand, this step is essential.
Mask the surrounding trim, paint, and rubber seals before any polishing or coating work begins. Headlights sit close to sensitive materials, and a premium result depends on controlling the work area. Sloppy edges are one of the fastest ways to make a detailing job look amateur.
If the headlights are oxidized, restore them first
If the lenses are hazy, yellow, or visibly weathered, you need to correct the surface before coating. Sometimes a machine polish is enough for light oxidation. More severe damage usually requires wet sanding followed by polishing to refine the lens back to clarity.
This is where the job can go from straightforward to technical. Sanding removes damaged material, but it also removes whatever remains of the factory UV layer. That means the protection step afterward is not optional. If a restored headlight is left bare, it can deteriorate again quickly.
For moderate to severe oxidation, professional restoration is often the better route. Precision matters, especially on newer vehicles with expensive lighting assemblies. A rushed sanding job can leave distortion, uneven clarity, or edge damage that is difficult to correct later.
How to apply ceramic coating to headlights
Once the lenses are clean, corrected if needed, and wiped down with a proper prep solution, you can apply the coating. Work indoors if possible, or at least in shade with a cool surface. Heat, wind, and direct sun make the product flash too quickly and reduce control.
Use a fresh applicator and apply a thin, even layer across the entire lens. Over-application does not improve protection. It usually creates high spots, smearing, or uneven curing. Slow, overlapping passes work better than trying to flood the surface.
Watch the coating as it begins to flash. The timing varies by product and temperature, so follow the manufacturer's instructions closely. Once it reaches the proper stage, level and buff the surface with a clean microfiber towel if the product requires it. Some headlight-specific coatings behave differently than paint coatings, so product choice matters.
If a second layer is recommended, apply it within the specified window. More is not always better, but layering can improve uniformity and durability when the product is designed for it.
Product choice matters more than most people expect
Not every ceramic coating is ideal for headlights. Some are built for paint and can work on lenses, but others are specifically formulated for plastic and polycarbonate surfaces. That matters because headlights face intense UV exposure and heat cycling.
A true headlight coating or a quality ceramic product approved for trim and plastic is usually the safest approach. The goal is strong bonding, optical clarity, and durable UV resistance. Cheap coatings may look good for a few weeks, then streak, cloud, or fail unevenly.
This is one of those areas where premium materials pay off. The labor involved in prep and restoration is significant, so protecting that work with a bargain product rarely makes sense.
Curing is where people ruin the finish
After application, leave the headlights alone. Avoid water, washing, and heavy exposure during the initial cure period. If the coating gets wet too soon, you can end up with spotting or reduced performance.
Most coatings need at least several hours of protection from moisture, and some need a full day or longer before normal exposure. If the vehicle lives outside, plan the job around the weather. That sounds basic, but rushed timing is a common reason coatings fail early.
If you had to sand and restore the headlights beforehand, proper curing matters even more. You have already invested time into rebuilding clarity. Shortchanging the cure window undermines the entire process.
What kind of results should you expect?
On clear headlights, expect a cleaner, glossier appearance and easier maintenance. The improvement is usually subtle but noticeable, especially on darker or higher-end vehicles where crisp front-end details stand out.
On restored headlights, the effect is more dramatic because you're pairing clarity correction with protection. In that case, ceramic coating helps preserve the restoration and slows the return of UV-related damage. It is not permanent, but it is a smart maintenance step.
Longevity depends on exposure and upkeep. A garage-kept vehicle will usually hold results longer than a car that sits in direct sun every day. Regular washing with proper products helps, while harsh tunnel washes and neglected bug buildup shorten coating life.
DIY or professional service?
If your headlights are already clear and you are comfortable with careful prep, a DIY ceramic coating application can be reasonable. The process is manageable when the surface is in good condition and the environment is controlled.
If the lenses are oxidized, heavily pitted, or you want a truly refined finish, professional service is usually the better investment. Restoration work takes judgment, consistency, and the right tools. On premium vehicles, replacing a damaged headlight assembly costs far more than having the job done correctly the first time.
For busy owners who want elite-level results without losing a weekend, mobile service adds another advantage. A professional can restore and protect the lenses at your home or workplace with the same focus on finish quality you'd expect from a high-end shop.
Common mistakes to avoid when learning how to ceramic coat headlights
Most problems come from skipping prep, coating over oxidation, applying too much product, or exposing the lenses to water too early. Another common issue is assuming every hazy headlight only needs a coating. If the damage is already in the lens surface, protection alone will not create clarity.
It also helps to think long term. Headlights are not a one-and-done detail if the vehicle sees regular sun and road use. Even with ceramic protection, they benefit from proper washing and periodic inspection to catch wear before it becomes full restoration work again.
Clear headlights do more than improve appearance. They sharpen the front end, support better light output, and help preserve the overall value of the vehicle. If you want them to stay that way, treat the coating step as the finish line of a precise process, not the shortcut.


Comments